在 Laravel 中使用 Algolia 實作搜尋功能
Algolia 是一個專精於搜尋的網路服務。
與 Elasticsearch 類似,只要將可供搜尋的資料匯入至 Algolia 的資料庫 (Index) 就可以在前端使用 Call API 的方式進行搜尋並取得搜尋結果。
有許多網站或是程式文件都是使用 Algolia 的搜尋服務 (例如 Laravel 與 Tailwind CSS 的官方文件)。
本文會介紹如何使用在 Laravel 中使用 Algolia 實現部落格中搜尋文章的功能
Here we go~
在 Algolia 中新建一個 Application 與 Index
想要使用 Algolia 的服務,那麼當然就要註冊一個 Algolia 的帳號,這邊就不多敘述帳號註冊的過程了。
註冊好帳號之後,我們需要先新建一個 Application。因為是以部落格中搜尋文章為例,所以新建一個名為 Blog 的 Application。
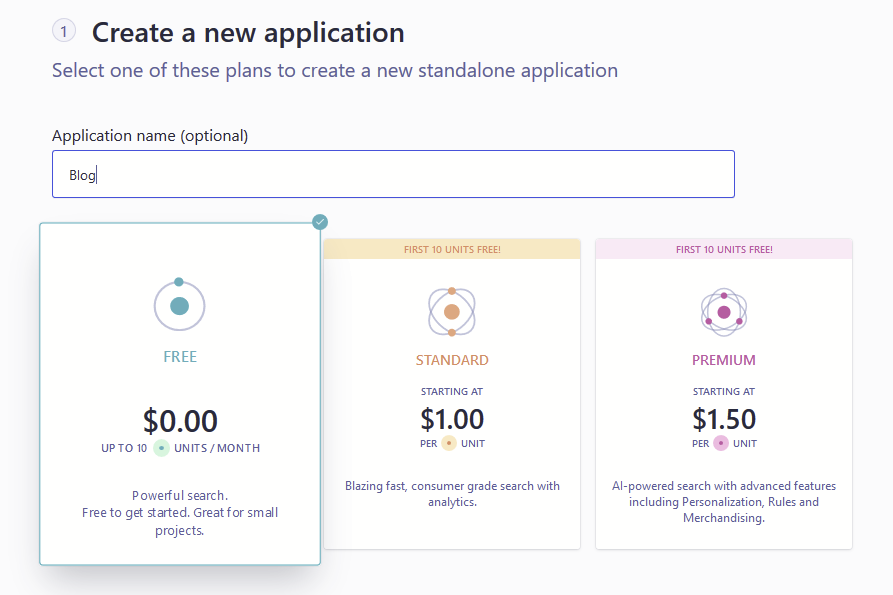
之後會請你選取 Data Center,因為 Japan 的延遲最低,所以建議選擇 Japan。
Application 新建好之後,可以至 API Keys 中查看 Application ID 與 Admin API Key。ID 與 Key 會在接下來用到,可以先記起來。
接下來在 Application 中新建一個 Index,用來存放搜尋的目標資料。

Index 新建好,就代表 Algolia 這邊已經告一個段落,接下來回到 Laravel 專案上。
文章資料欄位設定
假設文章的資料表名稱為 posts,與之對應的 Model,命名為 Post.php。
使用 migration 建立一個 posts 資料表,文章欄位設定如下:
<?php

use Illuminate\Database\Schema\Blueprint;
use Illuminate\Database\Migrations\Migration;

class CreatePostsTable extends Migration
{
    public function up()
    {
        Schema::create('posts', function (Blueprint $table) {
            $table->id();
            $table->string('title')->index();
            $table->mediumText('body');
            $table->integer('category_id')->unsigned()->index();
            $table->integer('reply_count')->unsigned()->default(0);
            $table->integer('view_count')->unsigned()->default(0);
            $table->integer('last_reply_user_id')->unsigned()->default(0);
            $table->integer('order')->unsigned()->default(0);
            $table->text('excerpt')->nullable();
            $table->string('slug')->nullable();
            $table->timestamps();
        });
    }

    public function down()
    {
        Schema::drop('posts');
    }
}
使用 migrate 創建資料表之後,緊接著要在後端安裝套件開始使用 Algolia。
Laravel Scout 的…加強版本
Laravel 官方有推出一個用來整合 Algolia 的套件,Laravel Scout。
但 Algolia 官方又以 Laravel Scout 為基礎推出一個加強版套件,既然是加強版,沒有理由不用 😂,因此我們先用 composer 安裝這個加強版套件。
composer require algolia/scout-extended輸入下方指令,會在 app/config 中生成一個設定文件 scout.php。
php artisan vendor:publish --provider="Laravel\Scout\ScoutServiceProvider"scout.php 可以用來設定要將資料上傳至哪個 Algolia 的 Index、每次上傳資料的最大數目、開啟資料同步佇列。
在 Post.php 中新增幾行程式碼,讓這個 Model 套用 Algolia 的搜尋功能。
你也可以使用 searchableAs() 與 toSearchableArray() 這兩個方法來客製上傳到 Algolia 的文章資料。
<?php

namespace App\Models;

use Illuminate\Database\Eloquent\Factories\HasFactory;
use Illuminate\Database\Eloquent\Model;
// 引入 Algolia Searchable
use Laravel\Scout\Searchable;

class Post extends Model
{
    // Trait Algolia Searchable
    use Searchable;

    .
    .
    .

    // 設定上傳的 Algolia index 名稱
    public function searchableAs()
    {
        return config('scout.prefix');
    }

    // 調整匯入 Algolia 的 Model 資料
    public function toSearchableArray()
    {
        $array = $this->toArray();

        // Applies Scout Extended default transformations:
        $array = $this->transform($array);

        // 新增一個新的欄位儲存作者名稱,並上傳到 Algolia
        $array['author_name'] = $this->user->name;

        return $array;
    }
}
然後在 .env 設定檔案中設定剛剛取得的 ID 與 KEY。
# Index 名稱
SCOUT_PREFIX=posts
# Application ID
ALGOLIA_APP_ID=秘密
# Admin API key
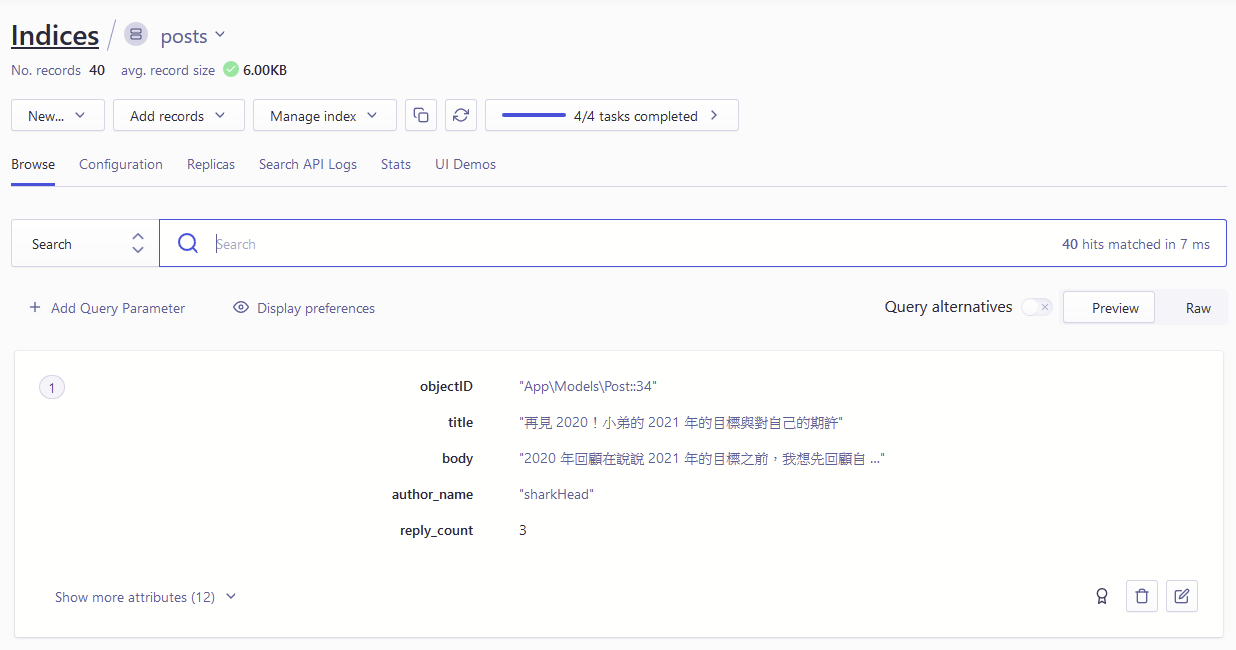
ALGOLIA_SECRET=秘密設定好之後,我們可以將 posts 的資料上傳到 Algolia。
php artisan scout:import指令執行成功之後,在 Algolia 上應該就可以看到 index 中有資料了。
這時候我們需要設定有哪些欄位可以被搜尋,以文章來說,如果我們只想要搜尋文章標題與文章內容。
有兩個方法:
- 我們可以直接到 Algolia Index 的主控台進行設定。
- 或是將 Algolia Index 主控台上的設定拷貝一份下來,並在
app/config底下生成一個設定文件scout-{index 的名稱}.php。
這裡使用第二個方法,輸入下方指令:
php artisan scout:optimize這個設定文件會根據 Index 的名稱生成一份 scout-{index 的名稱}.php 的設定檔案。
我們可以設定其中的 searchableAttributes,決定要搜尋哪個欄位的資料。
<?php

return [
    /*
    |--------------------------------------------------------------------------
    | Searchable Attributes
    |--------------------------------------------------------------------------
    |
    | Limits the scope of a search to the attributes listed in this setting. Defining
    | specific attributes as searchable is critical for relevance because it gives
    | you direct control over what information the search engine should look at.
    |
    | Supported: Null, Array
    | Example: ["name", "email", "unordered(city)"]
    |
     */

    // 設定要搜尋哪個欄位,這裡設定文章標題與內容
    'searchableAttributes' => ['title', 'body'],
    .
    .
    .
]
設定完之後,我們需要將改寫的設定更新至 Algolia Index,輸入下方指令:
php artisan scout:sync指令執行過程會詢問是否要將設定檔案更新到 Algolia Index 的設定,輸入 yes 就可以了。
前端搜尋 UI
既然 Algolia 上有資料,接下來就是做一個前端搜尋 UI,使用 Call API 的方式取得搜尋結果並顯示。
這邊我們會需要官方的安裝官方的 JavaScript API Client,首先在頁面上設定 algoliasearch 的 key。
<script>
    const algoliaId = "{{ config('scout.algolia.id') }}";
    const algoliaSearchKey = "{{ Algolia\ScoutExtended\Facades\Algolia::searchKey(App\Models\Post::class) }}";
    const algoliaIndex = "{{ config('scout.prefix') }}";
</script>
編寫 algolia.js 檔案,設定 Search Box。
import algoliasearch from 'algoliasearch';
import autocomplete from 'autocomplete.js';

const client = algoliasearch(algoliaId, algoliaSearchKey);
const posts = client.initIndex(algoliaIndex);

function newHitsSource(index, params) {
    return function doSearch(query, cb) {
        index
            .search(query, params)
            .then(function (res) {
                cb(res.hits, res);
            })
            .catch(function (err) {
                console.error(err);
                cb([]);
            });
    };
}

autocomplete(
    '#aa-search-input',
    {
        hint: false,
        templates: {
            dropdownMenu: '<div class="aa-dataset-post"></div>',
            footer: 'Search By Algolia'
        }
    },
    [
        {
            source: newHitsSource(posts, { hitsPerPage: 10 }),
            displayKey: 'title',
            templates: {
                header: '<div class="aa-suggestions-category">文章</div>',
                suggestion: function (suggestion) {
                    return `
                        <span class="w-100">
                            <a class="link-secondary text-decoration-none d-block w-100" href="${suggestion.url}">
                                ${suggestion._highlightResult.title.value}
                            </a>
                        </span>
                    `;
                },
                empty:
                    '<div class="d-flex justify-content-center align-items-center p-3">找不到符合搜尋字詞的文章</div>'
            }
        }
    ]
).on('autocomplete:selected', function (event, suggestion) {
    location.href = suggestion.url;
});
編寫 algolia.css,設定在 Search Box 的 CSS。
.aa-input-container {
    display: inline-block;
    position: relative;
}
.aa-input-search {
    width: 200px;
    padding: 5px 28px 5px 5px;
    border: 2px solid #e4e4e4;
    border-radius: 4px;
    -webkit-transition: 0.2s;
    transition: 0.2s;
    box-shadow: 4px 4px 0 rgba(241, 241, 241, 0.35);
    font-size: 16px;
    box-sizing: border-box;
    color: #333;
    -webkit-appearance: none;
    -moz-appearance: none;
    appearance: none;
}
.aa-input-search::-webkit-search-decoration,
.aa-input-search::-webkit-search-cancel-button,
.aa-input-search::-webkit-search-results-button,
.aa-input-search::-webkit-search-results-decoration {
    display: none;
}
.aa-input-search:focus {
    outline: 0;
    border-color: #3a96cf;
    box-shadow: 4px 4px 0 rgba(58, 150, 207, 0.1);
}
.aa-hint {
    color: #e4e4e4;
}
.aa-dropdown-menu {
    background-color: #fff;
    border: 2px solid rgba(50, 50, 50, 0.6);
    border-top-width: 0;
    width: 500px;
    margin-top: 10px;
    box-shadow: 4px 4px 0 rgba(241, 241, 241, 0.35);
    font-size: 16px;
    border-radius: 4px;
    box-sizing: border-box;
}
.aa-suggestion {
    padding: 6px 12px;
    margin-bottom: 5px;
    cursor: pointer;
    -webkit-transition: 0.2s;
    transition: 0.2s;
    display: -webkit-box;
    display: -ms-flexbox;
    display: flex;
    -webkit-box-pack: justify;
    -ms-flex-pack: justify;
    justify-content: space-between;
    -webkit-box-align: center;
    -ms-flex-align: center;
    align-items: center;
}
.aa-suggestion:hover,
.aa-suggestion.aa-cursor {
    background-color: rgba(200, 200, 200, 0.35);
}
.aa-suggestions-category {
    text-transform: uppercase;
    border-bottom: 2px solid rgba(50, 50, 50, 0.6);
    border-top: 2px solid rgba(50, 50, 50, 0.6);
    padding: 6px 12px;
    color: #333;
}
.aa-suggestion > span em {
    font-weight: 700;
    font-style: normal;
    background-color: rgba(58, 150, 207, 0.1);
    padding: 2px 0 2px 2px;
}
最後在頁面上載入。
<link href="{{ asset('css/algolia.css') }}" rel="stylesheet">

...

{{-- Search Box 位置 --}}
<div class="aa-input-container me-auto" id="aa-input-container">
    <input type="search" id="aa-search-input" class="aa-input-search"
    placeholder="搜尋文章" name="search" autocomplete="off" />
</div>

...

<script>
    const algoliaId = "{{ config('scout.algolia.id') }}";
    const algoliaSearchKey = "{{ Algolia\ScoutExtended\Facades\Algolia::searchKey(App\Models\Post::class) }}";
    const algoliaIndex = "{{ config('scout.prefix') }}";
</script>

{{-- 載入剛剛編寫的 Search Box --}}
<script src="{{ asset('js/algolia.js') }}"></script>
大功告成,可以搜尋文章囉~
