將 Rust 程式部署至 AWS Lambda
前陣子將自己的部落格部署到 AWS Lambda,不得不說實在是太香了。因為網站流量不高的關係,所以 Lambda 的費用相當低,基本上一個月不到 2 美金。即使是在 Lightsail 上租最便宜的機器,每個月的成本都無法這麼便宜。
雖然不太可能,但我還是害怕萬一某天網站來訪人數暴增導致我的 AWS 費用也跟著一起暴漲。為了在帳單暴漲時即時止損,我決定寫個小程式,每天透過 Telegram 通知我當月的 AWS 累積費用有多少。
迷之聲:你哪來的自信你的網站來訪人數會暴漲?
因為對 AWS Lambda 的印象很好,所以我也打算將這個小程式放在 Lambda 上,並透過 CloudWatch 的 Event Rule 定期執行。原本打算用 Python 來寫這個簡單小程式,後來覺得既然都學了 Rust,不妨嘗試用 Rust 來寫寫看吧。
申請一個 Telegram 機器人
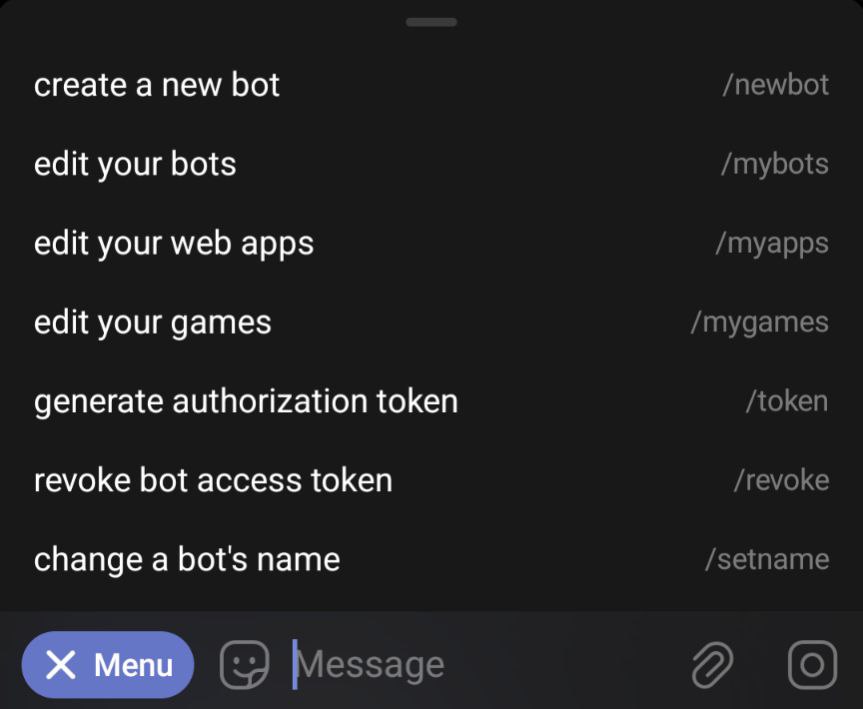
首先在 Telegram 上面找尋 BotFather 這個官方頻道,找到後可以在對話選單裡面選擇 create a new bot 開始新增你的機器人。

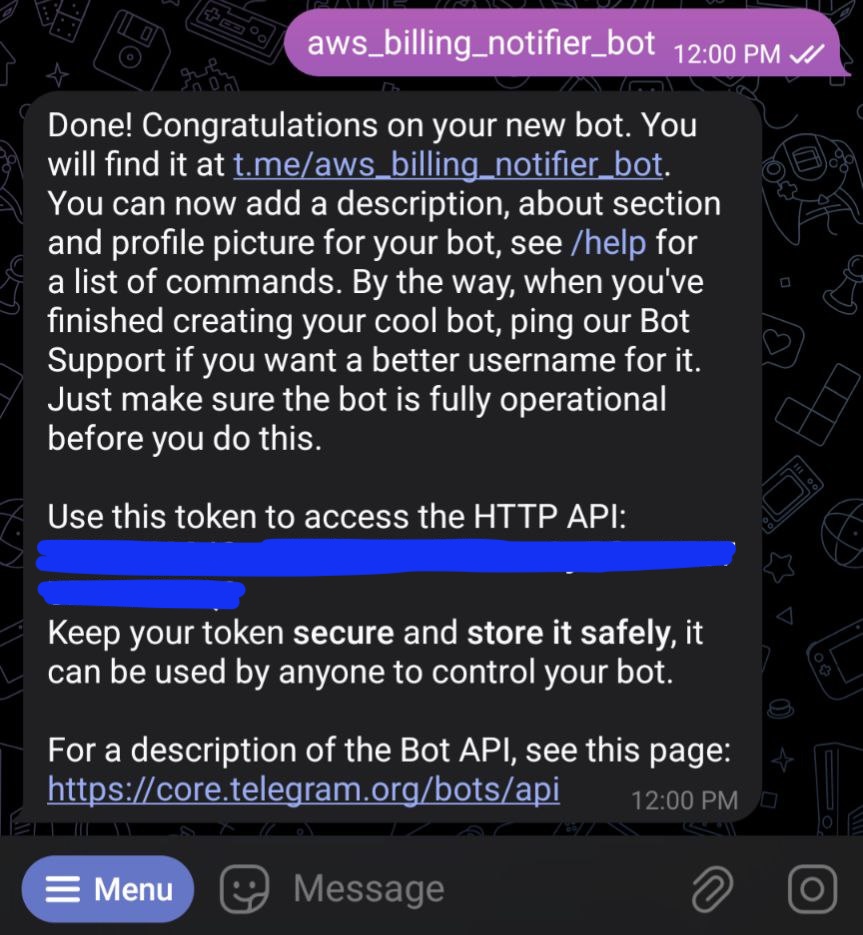
接下來只要依序回答 BotFather 的提問,輸入你想要的機器人名字與使用者名稱後,BotFather 就會新增一個 Telegram 機器人,並給你使用機器人的 Token。

有了機器人之後,接下來就是取得自己的 Chat ID,讓機器人可以根據這個 Chat ID 向我發送訊息。想知道自己的 Chat ID,可以到 RawDataBot 這個官方頻道輸入 /start,RawDataBot 就會回傳你的 Chat ID。
操作機器人的 Token 與 Chat ID 屬於敏感資訊,建議可以設定在 Lambda 的環境變數中。讓程式透過環境變數來取得這些敏感資訊。
準備好 Token 與 Chat ID 之後,就可以開始寫程式碼了。
用 Rust 寫一個 AWS 帳單通知機器人
首先用 cargo 指令新增一個 Rust 專案。
# 使用 cargo 指令新增一個 Rust 專案
cargo new aws-billing-notifier

cd aws-billing-notifier
更新 cargo.toml 檔案中的依賴套件。
[package]
name = "aws-billing-notifier"
version = "0.1.0"
edition = "2021"

# 更新下面這些依賴套件
[dependencies]
aws-config = { version = "1.5.5", features = ["behavior-version-latest"] }
aws-sdk-costexplorer = "1.40.0"
lambda_runtime = "0.13.0"
reqwest = { version = "0.12.5", features = ["native-tls-vendored"] }
tokio = { version = "1.39.2", features = ["full"] }
chrono = "0.4.38"
aws-sdk-sts = "1.38.0"
serde_json = "1.0.125"
依賴套件更新好之後,接下來就是修改 src/main.rs 的內容了。我想要在通知中明確顯示這個帳單是屬於哪個 AWS 帳號,因此先來建立一個取得 AWS Account ID 的函式吧。
async fn get_aws_account_id() -> String {
    // 我會在 Lambda 上面綁定一個 IAM Role 用來查詢 AWS 費用
    // 因此程式可以直接從環境上取得目前的 AWS 使用者資訊
    let config = aws_config::load_from_env().await;
    let client = aws_sdk_sts::Client::new(&config);

    let response = client.get_caller_identity().send().await;

    let response = match response {
        Ok(response) => response,
        Err(error) =>
            panic!("There was a problem getting the caller_identity: {:?}", error),
    };

    if let Some(account_id) = response.account() {
        account_id.to_string()
    } else {
        panic!("There was a problem getting the caller_identity");
    }
}
通知中最重要的就是顯示當月的累積費用,因此建立一個取得費用的函式。
use aws_sdk_costexplorer::types::{DateInterval, Granularity, ResultByTime};
use chrono::Datelike;

// ...

async fn get_aws_cost_in_this_month() -> Vec<ResultByTime> {
    let config = aws_config::load_from_env().await;
    let client = aws_sdk_costexplorer::Client::new(&config);

    let now = chrono::Utc::now().naive_utc();
    let start_of_month = now.with_day(1).unwrap();

    let start_date = start_of_month.format("%Y-%m-%d").to_string();
    let end_date = now.format("%Y-%m-%d").to_string();

    let date_interval = DateInterval::builder()
        .start(start_date)
        .end(end_date)
        .build()
        .unwrap();

    let response = client
        .get_cost_and_usage()
        .time_period(date_interval)
        // Unblended Cost 為 Cost Explorer 預設顯示成本的方式
        .metrics("UnblendedCost")
        // 以每月為基準回傳一個 List
        // 因為我只有指定當月份,所以基本上 List 中只會有一個元素
        .granularity(Granularity::Monthly)
        .send()
        .await;

    let response = match response {
        Ok(response) => response,
        Err(error) =>
            panic!("There was a error getting the cost and usage: {:?}", error),
    };

    let mut result_by_time: Vec<ResultByTime> = Vec::new();

    for result in response.results_by_time() {
        result_by_time.push(result.clone());
    }

    result_by_time
}
有了 AWS Account ID 與費用資訊後,就可以開始準備用 Telegram 來寄送通知了。
use reqwest::StatusCode;
use std::collections::HashMap;
// ...
async fn send_telegram_message(
telegram_token: &str,
// chat_id 為訊息傳送對象的 chat id
chat_id: &str,
message: &str,
) -> Result<(), reqwest::Error> {
let url: String = format!("https://api.telegram.org/bot{telegram_token}/sendMessage");
let mut params: HashMap<&str, &str> = HashMap::new();
params.insert("chat_id", chat_id);
params.insert("parse_mode", "MarkdownV2");
params.insert("text", message);
let url = reqwest::Url::parse_with_params(&url, ¶ms);
let url = match url {
Ok(url) => url,
Err(error) => panic!("There was a error parsing the url: {:?}", error),
};
let body = reqwest::get(url).await?;
if body.status() == StatusCode::OK {
println!("Telegram message sent successfully!");
} else {
panic!("Telegram message returned unexpected status: {:?}", body.status());
}
Ok(())
}新增一個 handler 函式來操作剛剛寫的函式,在取得 AWS Account ID 與費用後,用 Telegram 寄出費用通知。
use lambda_runtime::{Error, LambdaEvent};
use serde_json::Value;

// ...

async fn handler(
    telegram_token: &str,
    chat_id: &str,
    // 雖然會接收 Lambda Event,但這裡並不會用到
    // 以底線開頭告知 Rust 編譯器這個變數並不會使用
    _event: LambdaEvent<Value>,
) -> Result<(), Error> {
    let account_id = get_aws_account_id().await;

    let results = get_aws_cost_in_this_month().await;

    for result in results {
        if let Some(total) = result.total() {
            let value = total.get("UnblendedCost");
            let value = match value {
                Some(value) => value,
                None => panic!("There was a error getting unblended cost."),
            };

            let amount = value.amount();
            let amount = match amount {
                Some(amount) => {
                    let float_value: f64 = amount.parse().expect("Invalid float string");
                    let rounded_value = (float_value * 100.0).round() / 100.0;
                    let rounded_str = format!("{:.2}", rounded_value);
                    rounded_str.replace(".", "\\.")
                }
                None => panic!("There was a error getting the total amount"),
            };

            let unit = value.unit().unwrap_or_else(|| "USD");

            let message = format!(r#"
Your AWS Account __{account_id}__
The cost in this month is: __{amount}__ {unit}
            "#);

            send_telegram_message(telegram_token, chat_id, &message)
                .await
                .expect("There was a error sending telegram message.");
        }
    }

    Ok(())
}
最後是程式進入點的 main 函式,剛剛提到我們會把操作機器人的 Token 與 Chat ID 放入環境變數。我們可以在這裡取得我們設定的環境變數並傳入 handler 函式。
注意這裡一定要使用 lambda_runtime::run() 來接收 Lambda 的事件並執行 handler 函式。這樣才能在 CloudWatch 查看 Lambda 執行程式過程的 Log。
use lambda_runtime::{service_fn, Error, LambdaEvent};

// ...

#[tokio::main]
async fn main() -> Result<(), Error> {
    let telegram_token: String = std::env::var("TELEGRAM_TOKEN")
        .expect("A TELEGRAM_TOKEN must be set in this app's Lambda environment variables.");

    let chat_id: String = std::env::var("CHAT_ID")
        .expect("A CHAT_ID must be set in this app's Lambda environment variables.");

    lambda_runtime::run(service_fn(|event: LambdaEvent<Value>| async {
        handler(&telegram_token, &chat_id, event).await
    })).await
}
使用 Cargo Lambda 編譯 Binary 執行檔案
程式碼寫好之後,接下來就是要編譯 Binary 執行檔案了,但如果想將 Rust 部署至 AWS Lambda,需要使用 Cargo Lambda 這個工具來編譯才行,一般的 cargo build 是不行的。
首先使用 Homebrew 安裝 Cargo Lambda。
brew tap cargo-lambda/cargo-lambda
brew install cargo-lambda
在編譯執行檔案前,我們可以在本地測試程式有沒有問題。
# 首先設定必要的環境變數
export CHAT_ID="..."
export TELEGRAM_TOKEN="..."

# 在本地端啟動一個 Lambda 模擬服務
cargo lambda watch

# 嘗試呼叫本地的 Lambda 模擬服務
cargo lambda invoke --data-ascii "{ \"command\": \"hi\" }"

# 如果程式執行成功,終端機上應該會顯示
# Telegram message sent successfully!
接下來使用 Cargo Lambda 來編譯 Binary 執行檔案。
# 如果你想部署在 arm64 架構的 Lambda,可以加上參數 --arm64
cargo lambda build --release --output-format zip --arm64
編譯完成之後,就會在 target/lambda/aws-billing-notifier/ 資料夾底下生成一個 Binary 檔案 bootstrap.zip。
將 Rust 程式部署至 AWS Lambda
因為在工作上使用 Terraform 部署雲端資源已經很習慣了,所以這裡我也是直接使用 Terraform 將 Rust 程式部署到 AWS Lambda。
Cargo Lambda 其實有提供部署的指令,但我身為十年 Terraform 粉,還是選擇使用 Terraform 來部署。
首先在專案底下建立一個 terraform 資料夾。並在底下新增一個 variables.tf 檔案,用來定義部署時所需要的變數。
variable "telegram_token" {
  type        = string
  description = "Lambda's environment variables for setting the Telegram Bot's Token"
}

variable "chat_id" {
  type        = string
  description = "Lambda's environment variables for telegram user you want to send the message"
}

variable "filename" {
  type        = string
  description = "The rust binary file path"
}
變數的值可以放在 terraform.tfvars。
chat_id="..."
telegram_token="..."
filename=".../aws-billing-notifier/target/lambda/aws-billing-notifier/bootstrap.zip"
注意 filename 是絕對路徑。
變數都設定好之後,新增一個 main.tf,並將所需要的雲端資源通通寫上去。除了新增 Lambda,也會把 Lambda 需要的 IAM Role 以及定期執行 Lambda 的 Event Rule 設定好。執行時間我設定為台灣時間每天中午的 12 點。
data "aws_iam_policy_document" "aws_cost_notifier_assume_role" {
  statement {
    effect = "Allow"

    principals {
      type        = "Service"
      identifiers = ["lambda.amazonaws.com"]
    }

    actions = ["sts:AssumeRole"]
  }
}

resource "aws_iam_role" "aws_cost_notifier_assume_role" {
  name               = "aws_cost_notifier_lambda_assume_role"
  assume_role_policy = data.aws_iam_policy_document.aws_cost_notifier_assume_role.json
}

# 這裡偷懶直接給最高權限,正式環境請給對應的最小權限
data "aws_iam_policy_document" "aws_cost_notifier" {
  statement {
    effect    = "Allow"
    actions   = ["*"]
    resources = ["*"]
  }
}

resource "aws_iam_policy" "aws_cost_notifier" {
  name   = "aws_cost_notifier"
  policy = data.aws_iam_policy_document.aws_cost_notifier.json
}

resource "aws_iam_role_policy_attachment" "aws_cost_notifier_assume_role" {
  role       = aws_iam_role.aws_cost_notifier_assume_role.name
  policy_arn = aws_iam_policy.aws_cost_notifier.arn
}

resource "aws_lambda_function" "aws_cost_notifier" {
  filename         = var.filename
  source_code_hash = filesha256(var.filename)
  function_name    = "aws-cost-notifier"
  role             = aws_iam_role.aws_cost_notifier_assume_role.arn
  handler          = "bootstrap"
  runtime          = "provided.al2023"
  architectures    = ["arm64"]
  timeout          = 300 # 5 minutes

  logging_config {
    log_format = "Text"
  }

  environment {
    variables = {
      TELEGRAM_TOKEN = var.telegram_token
      CHAT_ID        = var.chat_id
    }
  }
}

resource "aws_cloudwatch_log_group" "lambda_log" {
  name              = "/aws/lambda/${aws_lambda_function.aws_cost_notifier.function_name}"
  retention_in_days = 7
}

# UTC 4 點為台灣的中午 12 點
resource "aws_cloudwatch_event_rule" "at_four" {
  name                = "at_four"
  description         = "At 04:00 (UTC)"
  schedule_expression = "cron(0 4 * * ? *)"
}

resource "aws_cloudwatch_event_target" "trigger_aws_cost_notifier" {
  rule      = aws_cloudwatch_event_rule.at_four.name
  target_id = "aws_cost_notifier"
  arn       = aws_lambda_function.aws_cost_notifier.arn
}

resource "aws_lambda_permission" "trigger_aws_cost_notifier" {
  statement_id  = "AllowExecutionFromCloudWatch"
  action        = "lambda:InvokeFunction"
  function_name = aws_lambda_function.aws_cost_notifier.function_name
  principal     = "events.amazonaws.com"
  source_arn    = aws_cloudwatch_event_rule.at_four.arn
}
完成後就可以使用 Terraform 執行部署了。
# 初始化並安裝 terraform provider
terraform init

# 查看部署計畫並開始部署
terraform deploy
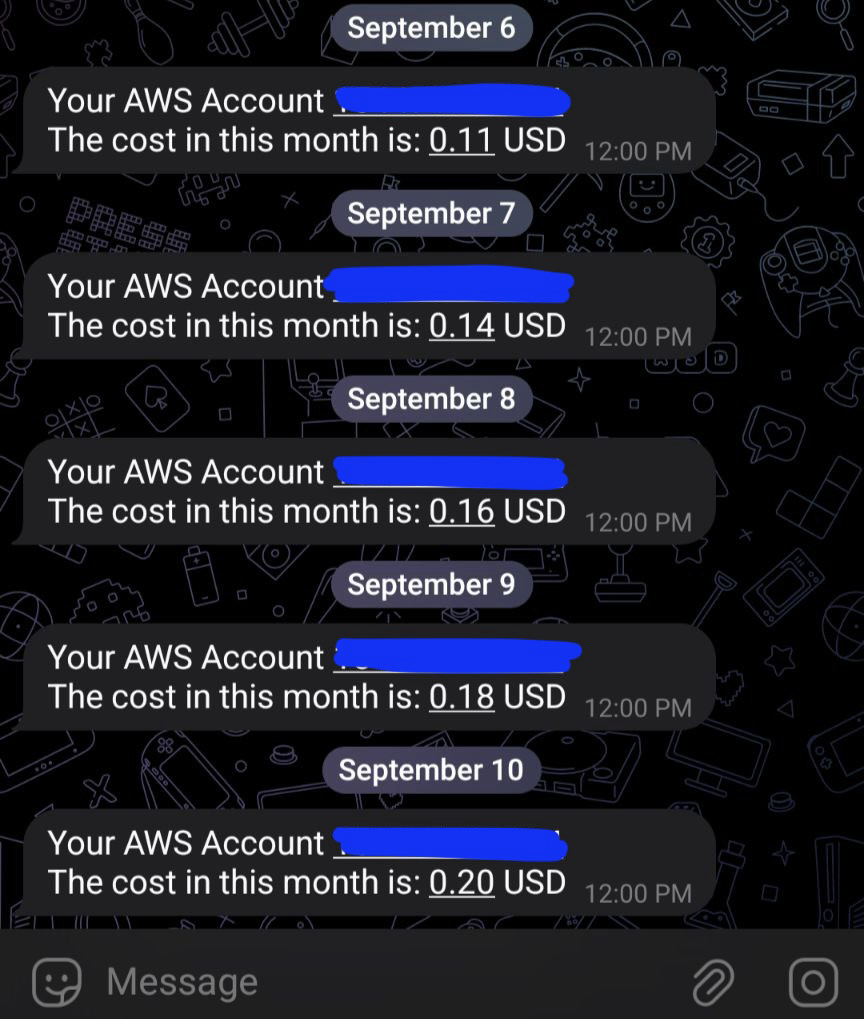
部署成功後就可以開始接收費用通知囉!

題外話
這是我將「為什麼寫這個小程式的原因」告訴公司前輩後的對話:
前輩:「雖然你是說想要避免帳單爆炸才寫這個程式,但是 AWS 花費大概要過 4 個小時才會顯示在帳單上。如果 Lambda 真的讓你的帳單爆炸了,你也是 4 個小時後才會知道了。」
我:「就當作這是該吃中餐了的通知吧!」